This is the second of a series of posts on digital darkroom techniques describing digital darkroom techniques that “combine” groups of images towards various ends.
Focus blending is a technique for combining a series of images of the same scene to create a resulting image with a wider depth-of-field. Focus blending is best-known to aficionados of macro photography, as depth-of-field at close distances is almost always razor-thin even at the tiniest apertures. While best known in macro circles, it could benefit any type of photography where it’s impossible or pragmatic to get enough depth-of-field.
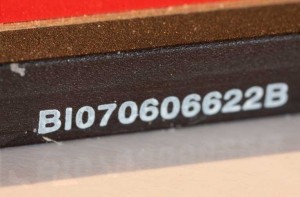
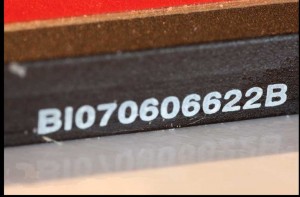
The first step in focus blending is capturing the images to be blended. For this example, I made five separate exposures of the same scene (the edge and model number of a CF memory card) using a tripod, the Canon EOS 1Ds Mark 3, and the Canon MP-E 65mm 1-5X macro at about 3x. Normally between each shot you will make a slight adjustment of the focus ring after each exposure, but the MP-E lacks a focus adjustment, to focus it, you either move the camera or the subject, or change magnification (as the focusing distance varies with magnification.). Had I been making a fine print I probably would have taken at least ten images made with slightly finer adjustments, the right number of images is going to vary depending on your situation.
Here are the first and last images in the series:
I think loaded these images into Lightroom (ACR would have worked just as well), made sure their white balance and exposure levels were matched, and then exported them using “Edit In…” > “Open as Layers in Photoshop”. Then, after selecting all five layers, I aligned them separately using Edit > Auto-Blend and selected “Stack Images” from the menu.
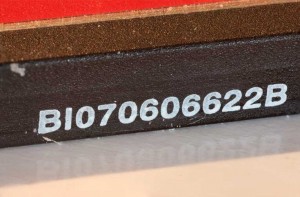
Photoshop takes a fair bit of time at this point, and will demand quite a bit of memory particularly for large images such as mine. Working on a less powerful laptop, I was forced to close other applications and use Edit > Purge to clear up enough RAM for the process to complete, but when it did, the results were pretty good:
What Photoshop had done at this point was to simply create a layer mask for each of the five layers, each mask entirely black and white, each pixel of the resulting image comes directly from one of the component images. While I didn’t attempt it, little errors or glitches in the results might easily be touched up at this point simply by cleaning up the layer masks. This is going to prove particularly necessary when objects in the scene move between captures, a situation which can really throw blending software.
It’s entirely possible to paint layer masks for this sort of thing by hand, it’s just time-consuming. My photograph of flowers on Shell Creek Road is a two-shot composite, which allowed me to keep both the horizon and flowers inches from the camera in sharp focus, but painting the layer mask was a real challenge, in part due to the flowers moving. The result was worth the trouble, I just shipped a 30×20″ print to an art consultant last month of that image.
Finally, there are third-party applications for focus blending that deserve a look as well, most notably Helicon Soft’s “Helicon Focus” and “Helicon Focus Pro” applications, which provide more flexibility and a number of additional features such as stereo imaging.


