Perfect Photo…

From your iPhone?   Well maybe not perfect, but certainly better than what you’re able to do with the stock camera.   Last week I reviewed the Best Camera app and one of my complaints about the preset filters was the fact that the user can not edit those filters. The Perfect Photo app does allow more fine tuned control over the image.

Like most camera based apps you can either shoot a new picture right from the app or load one from your saved images. From there you’ve got the ability to edit several aspects of the image.

You can…

  • rotate/flip
  • crop
  • adjust alignment (i.e. fix crooked images)
  • adjust brightness/contrast
  • adjust gamma
  • adjust exposure
  • increase shadow detail
  • increase highlight detail
  • adjust levels
  • adjust hue, saturation and lightness
  • adjust color balance
  • adjust color temperature
  • sharpen
  • remove noise

There are also several preset effects: (more…)
Continue Reading

A simple cheat to direct a viewer’s eye

We can’t always control the shoot as much as we’d like. One of my regular gigs is shooting real food prepared by real kitchen staff at real restaurants. The shots are more about the cooks and the restaurants than about my photographic prowess. Many times food comes out of the kitchen looking perfect, other times … not so much.  On these assignments I’m also usually restricted to available light, or minimal supplemental lighting. Immediately I’ve lost control over two key aspects of the shot. It’s on assignments like these that I’ll often employ a trick that’s so simple I’m almost   embarrassed–vignetting.

By artificially darkening the corners and edges of images we can direct the viewer’s eye toward the center. The trick is to not overdo it, but to have it be subtle. If you look at an image and think, ‘Oh, darkened corners,’ you’ve most likely gone too far. There are several points along the way where you can employ this trick, but my preference is in Photoshop, after the image has been cropped and the contrast adjusted.

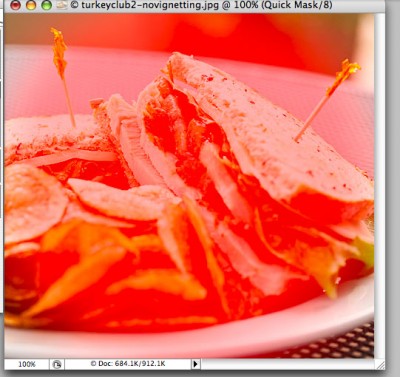
My personal method involved the Quickmask tool and an Adjustment layer. On you image, enter Quickmask mode (Q key command) and select a round paint brush of appropriate size. Then simply mask the majority of the image. Remember this is a mask, not a selection, so the areas you paint will not be affected by the next step.

Quickmask mode
Quickmask mode

(more…)

Continue Reading
Close Menu