Cause Marketing for Photographers

As we move towards the coming new year many of us are beginning to implement a new marketing plan. Also, as the holiday season comes to a close many of our thoughts are on giving. Cause marketing is an opportunity to combine the two. For those unfamiliar with the term, cause marketing is a form of marketing that allows two organizations, one for profit, and one non-profit, to work together to further each of their individual marketing/development goals in a cooperative fashion. Think of the (product) RED campaign, or the partnership between the NFL and United Way.

Cause marketing can be as simple as offering a sponsorship to a local charity event, or as involved and complex as you care to make it. Below are some examples of actual cause marketing campaigns I’ve seen photographers in my market employ”¦

  • A local portrait/wedding studio holds quarterly workshops for photographers on various business practice issues. They host at their studio and usually bring in a guest speaker. They don’t charge attendees directly but ask that they make a donation to a specific charity ($40 to the local food bank or so.)
  • A commercial photographer sponsors a hole-in-one contest at a charity golf outing. If a participant scores a hole in one, they win $10,000. He gets a bond each year to cover it for about $100. He’s at the tee of that hole, shoots a photo of the foursome and mails each of them a print (with his logo and web address of course.)
  • A fine art photographer gives 25% of sales of a series of images of the Chesapeake Bay to a local environmental charity.
  • In lieu of holiday gifts for his corporate clients, an industrial photographer makes a donation to the USO (many of his clients are in the defense industry and are veterans). He then sends the clients a note thanking them for their business and letting the client know that he’s made that donation. (more…)

Continue Reading

The Tuesday Composition: The Attraction of Opposites

The contrast between the size and age of the guanaco calls our attention to not only to the difference, but to the relationship between the two.
Guanaco Anticipating the Future. The contrast between the size and age of the guanaco calls our attention not only to the difference, but also to the relationship between the two.

If you like this article, you can now get the book! Joe has expanded the “Tuesday Composition” series into an inspiring new ebook on composition, especially for nature photography. Check it out: The Tuesday Composition.

Opposites attract ... our attention.

Opposition is one of the primary themes in photographic composition, one which was first emphasized to me by Frans Lanting, the powerfully talented photographic storyteller. At the simplest level, putting together two areas of different tone (brightness) forms a contrast which pulls our eyes toward the boundary between them. Contrasting opposing colors has a similar effect, attracting our attention and actually enhancing the saturation and power of the individual colors.

But using contrast and opposition in composition goes far beyond that, contrasting concepts can be a very powerful tool for composing a photography to communicate a particular message. Contrasting concepts, much as with contrasting colors, has two effects.

First, the viewer’s attention is drawn to the nature of the contrast. The black and white of a yin-yang symbol draws our attention to tones, the difference between light and dark.  Similarly, a photograph of an infant and an adult leads the viewer to think about age, and as a result, perhaps issues of family relationships and parenting. It’s almost impossible to view Guanaco Anticipating the Future without thinking about the relationship between the two animals (we assume that one is the parent of the other), a concept that wouldn’t come to mind nearly as quickly if I’d only included one animal (or two of the same age and size).

Pink Morning Mists
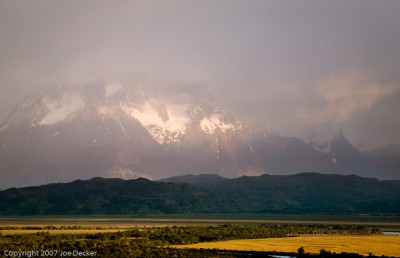
Pink Morning Mists, Torres del Paine.

Second, contrasting two things seems to often exaggerate each of them. If we put a smooth texture next to a rough texture, both the smoothness and the roughness are stronger, more apparent. If we put a moving object (perhaps communicated with motion blur) in an unmoving scene the sense of motion may be enhanced. (more…)

Continue Reading

Canon Powershot G11 Digital Camera: Field Test Report

Peter Burian tests this premium-grade camera with 10MP resolution to determine how it compares to the very popular G10

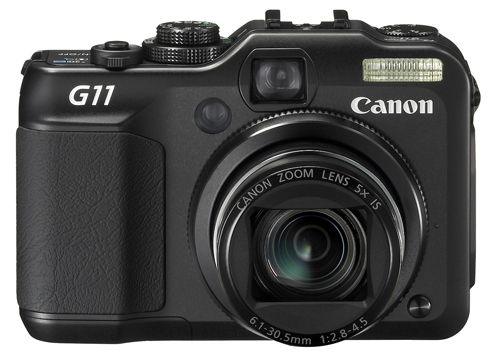
G11_FRONT

One of the top rated digicams on the market, the 14.7 megapixel PowerShot G10 was recently replaced by the G11, with lower resolution said to provide superior image quality. The G10 was definitely an ideal second camera for serious photographers. In fact, this is the one that many of the pros carried when we went out for dinners while working at a week-long photo seminar in Dubai. (Also see Jack Neubart’s Canon PowerShot G10 Review here at Photocrati.com)

After testing the G10, I fell in love with that camera and bought one for my own use. While it received rave reviews about its conventional controls and low ISO quality, most test reports complained about its high ISO performance.

The 14.7 megapixel G10 was a highly-rated camera and produced fabulous images at low ISO but the G11 is even more desirable in some aspects. While resolution is lower at 10 MP, most reviewers agree that this is plenty for a digicam with built-in lens. (G11; ISO 100; f/8; 1/40 sec.)


In my own review for a Canadian magazine, I made the following comment about the G10: By ISO 800, images made in low light are still very sharp but very grainy although that’s not a problem in 5×7″ prints. At higher ISO, JPEG quality really suffers due to speckling and some smearing of fine detail by Noise Reduction processing. At ISO 800+, slightly better results are possible with Raw capture since Noise Reduction and Sharpening can be set to the optimal level in the converter software.

Most technical experts indicated that the problem was caused by the excessively small pixels (photosites). Apparently the engineers at Canon agreed since the company responded by replacing the G10 with the G11, with substantially lower 10 megapixel resolution provided by a new High Sensitivity sensor. That step made sense of course, since it allowed for larger photosites – with greater light gathering ability – for superior results at high ISO. (more…)

Continue Reading

Depth of field and light at a Wedding or Bar Mitzvah

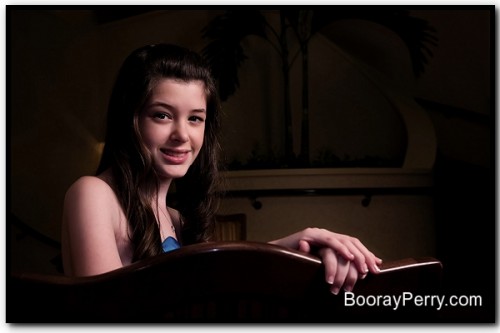
Many wedding and Bar Mitzvah photographers find themselves in a bit of a pickle when they are first starting out.  You’ve looked at hundreds of websites and seen all these incredible, artistic wedding pictures and decided “I want to do that.”   So, you buy all the equipment, flashes and fast lenses that you can afford and set out to create beautiful, moving images.   You spend all this time and energy in pursuit of the artistic and then suddenly discover that you can’t shoot the mundane … and let me tell you, there is a lot of mundane to shoot at a 7-hour wedding.  

It’s not our fault that we don’t always learn how to take these shots.   They aren’t the sort of shots that get featured on the web or in the pages of a magazine.  It’s great to see those beautiful shots of an outdoor wedding and the incredible formals but  what about  the other 500 pictures  the photographer  took? You know, the ones in the dark hall with the dancing people? You don’t see many of those on the ol’ website because they aren’t quite as dynamic.  Still, being able to take a good table shot or dancing shot is every bit as important as the perfectly lit formal.  For some clients it may be more important, depending on who is sitting at the table or dancing on the floor.  

My first rule of photography is this: Get the shot. First, learn how to get the shot, any shot, in any situation.  Then, learn how to get it in an artistic and creative way (if needed). Don’t spend so much time learning the “hard” shots that you neglect to learn the “easy” ones.  You may find that the “easy” ones aren’t so easy after all.

Let’s take a look at  some pictures from a recent Bat Mitzvah that I photographed in Tampa.  I’ll start with a “hard” one:

tampa bat mitzvah photographer 18

(more…)

Continue Reading

The Tuesday Composition: Photographing the Familiar and the Unfamiliar

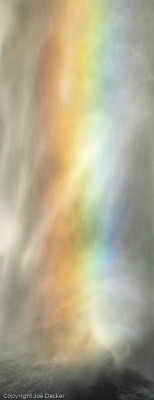
Rainbow Whirlwind, Seljalandfoss, Iceland
Rainbow Whirlwind, Seljalandfoss, Iceland. I don't need to show much of the waterfall, or the water at the bottom of the fall, to give you a sense that this is a waterfall--and a very large one at that.

If you like this article, you can now get the book! Joe has expanded the “Tuesday Composition” series into an inspiring new ebook on composition, especially for nature photography. Check it out: The Tuesday Composition.

It is all too easy to forget that when we photograph that we are usually photographing for someone, even if only ourselves. Photography is a type of communication, and the best way to compose a photograph to communicate someone depends on both what you’re trying to communicate and who you are trying to communicate it to. Familiarity is key–if you’re trying to photograph a particular type of animal, if your viewer is likely to be familiar with the animal you’ll want to approach photographing it differently than if they aren’t likely to have seen one before.

It’s helpful to draw an analogy with a dinner party conversation. If you and I are chatting and I start talking about Death Valley, I’ll probably guess that you’ll have heard of Death Valley.  I’ll guess that you’ll know it’s a large desert area in California, that it gets very hot there, and perhaps that it has sand dunes. If I start off the conversation by reiterating a bunch of stuff you already know about Death Valley, you’re going to get bored pretty quickly. On the other hand, if I start talking to you about the Aeolian Buttes, I’m probably going to start with an assumption that you know a little less about it, and start with a more basic information.

Of course, when I’m talking to someone, I have the opportunity to adjust this on the fly, if you say “Oh, I love that part of the Mono Basin”, I can move along. But in photography (and writing as well), I don’t have that flexibility. I have to choose up-front how much to say in my photograph, and how much not to say.

Noa Lake, East Greenland

If I don’t say enough, I may not actually “get across” whatever it is I want to get across. If I really want to show you how cool the oddly pink Noa Lake is in East Greenland is, a little detail of pink water may be aesthetic, that may be a great piece of art, but if I’m trying to tell you about the lake in general I’m going to have to include the whole lake, the surrounding landscape, mountains and lichen. I’m going to have to establish a sense of scale, I’m going to have to use the other parts of the photograph to help you realize that the pink stuff is pink translucent water and not just a trick of the light.

On the other hand, If I say too much, if I “overexplain” something in a photograph by showing you to much of it and/or by emphasizing it, you may not be insulted but you’ll certainly not be particularly interested. (more…)

Continue Reading

Leica M9 Digital Camera Review: Field Test Report

Jack Neubart takes a step back in time to test this century’s classic manual-focusing, full-frame 18 MP CCD interchangeable-lens camera for the ages (along with the Summilux-M 21 mm f/1.4 ASPH).

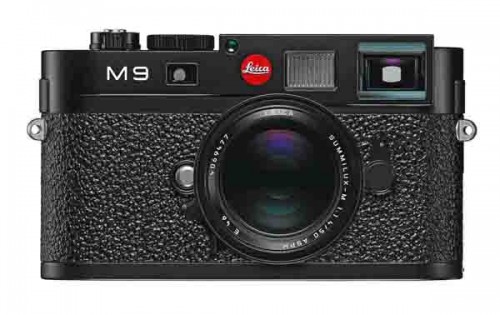
Leica M9 (front). A ruggedly built, Euro-styled digital rangefinder in which quality, performance, and price go hand in hand. Photo courtesy Leica.


It has been a very long time since I last worked with a rangefinder camera. And likely just as long since I last had the distinct pleasure of working with a Leica, although, as I recall, that was an SLR. The one thing that did stand out in my mind was how crisp the images were that came out of the Leica lenses I used.

Given that digital is, in a sense, a more complex image-forming process involving any number of variables mediating from the moment of capture on an imaging sensor and in-camera processing until the final image springs to life, I’m not sure that we’ll ever see quite the same quality, regardless of the lens or camera, or sensor. And yet we as photographers still manage to evolve our art with the technology and find ways to take that technology to new levels of creativity and bring new heights of awareness to every moment and scene we capture with our cameras.

The Leica M9 brings to mind my very first camera, the one that my dad bought me when I was a wee lad, and which he wouldn’t let me use for some years, afraid I’d break it (okay, I eventually did-but it wasn’t my fault, dad, I swear). So I bided my time and when the New York World’s Fair of 1964/65 rolled round, I finally got the chance to take the camera out on my own.

I loved that 35mm camera-a Neoca (Japanese top to bottom). It was no Leica by any stretch of the imagination. Didn’t even have a light meter inside. But it was a rangefinder. And what I remember about that rangefinder is that I was never entirely comfortable using it-I just didn’t feel it gave me the speed I needed or the certainty. And that’s still how I feel about rangefinder focusing. (However, I’m certain that many of you may feel just the opposite and would take a rangefinder over autofocusing or any other type of focusing any day of the week.)

And that brings us full circle to the M9, a full-frame, 18MP CCD digital camera featuring coincident-image rangefinder focusing-with the added benefit of interchangeable Leica lenses. (more…)

Continue Reading

The Tuesday Composition: Lighting and Composition

Traces of the Ancient Thule
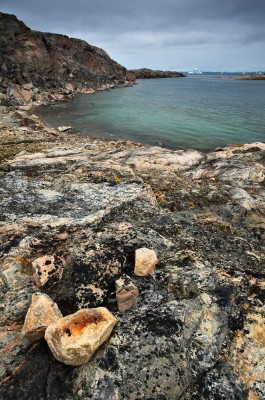
Traces of the Ancient Thule, Danmark Ø, Scoresbysund, East Greenland. I wanted more texture in the foreground, front-lighting and soft light from clouds kept the rocks from being visible. I couldn't move to the side, because I wanted to include the bay behind. I couldn't come back because of the constraints of getting to this location in Greenland. My only option for introducing texture and depth into the foreground rocks was adding some fill flash, which I did with the help of a reflector.

If you like this article, you can now get the book! Joe has expanded the “Tuesday Composition” series into an inspiring new ebook on composition, especially for nature photography. Check it out: The Tuesday Composition.

A few years back, Frans Lanting said something in passing that’s really stuck with me, I presume it’s an old studio lighting maxim:

Front-lighting for color, side-lighting for texture, back-lighting for form.

This line is pretty much a recipe for how to light an object in the studio depending on what aspect of it you want to emphasize. Got a colorful subject? Start by photographing from the same direction as the light is coming from. Want texture?  Make sure the light is coming in from the side, that way it’ll be raking across the front of the subject you’re looking at and showing shadows on even the smallest bits of texture. And want to show the shape of something? Backlight it, and create a silhouette.

Obviously it’s simplistic (as any nine words of advice must be), but it’s not a bad place to start when thinking about lighting.

In addition to light direction, we also talk about the difference between soft (wide) light sources and hard (tiny) light sources. Hard lighting tends to pick up more texture by creating better-defined shadows than soft lighting.

What does all of this have to do with composition?

While we have a great deal of flexibility in lighting subjects in the studio, many of us who photograph nature, or events, or sports often have a little less room to organize our environment the way we’d like. We might have a couple different objects in our scene, and perhaps we’d like the form of one of them juxtaposed with the color of another and the texture of a third, and the light might be doing something else entirely. (more…)

Continue Reading

End of year number crunching

I don’t know about you, but I didn’t get into photography because I love business management. The whole idea of pouring over spreadsheets and sales reports really is one of my least favorite activities associated with running the business. But this is a business, and we do what we must.

One thing I’ve been able to glean from my years in business is to know when things are slow, and when they’re not. I know that starting Thanksgiving, and ending when the kids go back to school – we’re pretty much dead here. We’ll have a few jobs but it’s generally a good time to do the management tasks that goes with having your own Federal ID number. I choose to do this now, less because it’s year end (our corporate year is the calendar year) but rather since it’s slow right now. (more…)

Continue Reading

Shooting Sports 1 – A Primer

Over the past several years, I’ve had the opportunity to shoot a wide variety of sports. I am a people/portrait/event photographer in Frederick, MD, but I also have two active kids.

I also have a wide variety of friends who have kids active in sports, and who ask me to take pictures of their kids doing the things they do – which include sports. When you tote a camera everywhere, people assume you take pictures “everywhere”.

I was also fortunate enough to have the opportunity to serve as the Digital Media Director, responsible for photography and videography, for the U.S. Deaflympics Team at the recent Deaflympics in Taipei, Taiwan. (See the photos here.)

My goal with the next several articles is to help the budding sports photographer (or the involunteered sports photographer) get better pictures. In my experience, it usually takes two to three games of shooting before you learn the tempo of that particular game, and learn where to stand to improve your odds of getting a better shot. With proper instruction and guidance, my hope is that you will be walking away with keepers on the very first game. (more…)

Continue Reading

Q and A: Raw capture mode is confusing. Can you help?

Question

I need some advice about using RAW capture mode. I have just started shooting in RAW mode but after some research on the Internet, I still have some questions about RAW. Why won’t Photoshop CS3 or Elements 7 open and convert the RAW files from my EOS T1i? Also, when using the Canon DPP software, should I save the photos to an 8-bit Tif or a 16-bit Tif. L.V.

Answer

The software that’s bundled with any DSLR certainly supports the unique RAW format produced by that camera. However, versions of Photoshop that are older than CS4 – such as CS3 – do not support the newer cameras’ formats.

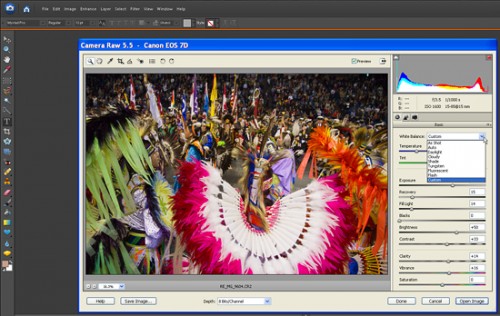
That’s because Adobe ceased supporting the older versions. Both Elements 6 and 7 do support the RAW files produced by most of the recent cameras, including the T1i. Anyone who cannot open a RAW file with Elements 6 or 7 will need to download and install the Adobe Camera Raw plug-in version 5.5. See Adobe for the download and for installation instructions. (Photoshop CS4 owners should note that they may also need version 5.5 or later.)

All versions of Photoshop Elements - since version 6 - can support all of the latest DSLRs' RAW formats. Of course, with newer cameras, that may require installing the latest version of the Adobe Camera Raw plug-in.  ©2009 Peter K. Burian
All versions of Photoshop Elements - since version 6 - can support all of the latest DSLRs' RAW formats. Of course, with newer cameras, that may require installing the latest version of the Adobe Camera Raw plug-in. ©2009 Peter K. Burian

The default with any RAW converter is 8-bit per channel color depth when converting to the TIFF format from a RAW file. Most converter programs also allow you to select 16-bit TIFF. (more…)

Continue Reading
  • 1
  • 2
Close Menu