© Ken Hallstrom-Meade
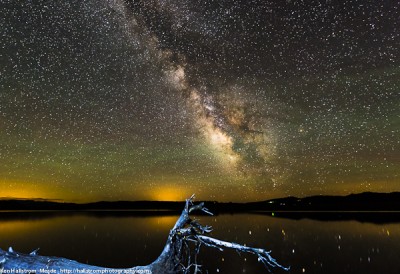
Featured Member: Ken Hallstrom-Meade
What kind of photography do you do? Landscape, Macro, Nature, Skyscapes (recently after photographing the Milky Way Galaxy) Story behind this image: On the way to work one day I…
What kind of photography do you do? Landscape, Macro, Nature, Skyscapes (recently after photographing the Milky Way Galaxy) Story behind this image: On the way to work one day I…

A couple days ago, Adobe released Lightroom 3.0 Beta 1, which introduces a variety of new features, but also introduces a new RAW processing engine. While many of these features are fairly simple to appreciate, the changes to the RAW processing engine are just as exciting, and worth a look as well.
I will intentionally avoid talking about performance differences. While I haven’t noticed particular performance differences between LR2 and LR3B1, I haven’t looked and wouldn’t consider any such comparison valid until it was made on a “release version vs. release version” basis, the performance of beta versions often differ from that of release versions for a variety of reasons that I won’t belabor here.
But if history is any guide, we can start looking at image quality, particularly with promised improvements to noise reduction and sharpening. Be careful not to read too much into these results, Adobe has intentionally turned off luminance noise reduction in LR3B1. Since it’s off by default in LR2, that shouldn’t impair our comparisons too much, but it is something to keep in mind.
To compare the two, I looked at differences in the results of the raw processing engines on a few ISO 3200 images of a camera bracket from my Canon EOS 1Ds Mark III. I’ve included a pair of 100% crops of raw conversions from the same file for your comparison. These samples are illustrative of the sorts of changes I’ve seen in the handful of other files I’ve examined so far. Both samples were converted entirely “as shot” with default settings for each version of Lightroom. (more…)

One of the most common questions I get when teaching my Adobe Lightroom workshops, is whether Lightroom is enough. The answer to that question depends on your needs and goals. But it is worth spending a bit of time reviewing reasons a photographer who has Lightroom 2 might also want to invest in Photoshop:

Many times I’ve heard the understandable complaint that, after a good bit of working an image to get just the right color, that those colors are sapped by Photoshop or Lightroom when the image is exported to JPEG and then viewed on the web. There are all sorts of explanations on the web about this, and a lot of posturing about the “right way to handle things,” and there are all sorts of issues with the wealth of uncalibrated monitors out there, web browsers that don’t support color management at all (IE, Chrome, older Firefox) vs. those that do support it (Safari, more recent Firefox).
I figured it was time to do some testing. (more…)

Several times a year I teach a one-day workshop on optimizing images using Adobe Photoshop Lightroom 2 at the local art league, and in doing so I’m often asked for a good book recommendation for someone learning Lightroom. As I’ve mentioned in my previous review, my usual recommendation has been Martin Evening’s book The Adobe Photoshop Lightroom 2 Book: The Complete Guide for Photographers.
In the process of keeping my eyes open for new resources, I recently purchased and watched “Where the #%*! are My Pictures?”, a three-hour video series by Michael Reichmann and Seth Resnick which focuses on the the file-handling, digital asset management (roughly speaking, the Library module) aspects of Lightroom. I’ll be adding this to my list of top recommendations for Lightroom resources, I think it’s particularly appropriate for folks who have a basic familiarity with Lightroom but are ready to take their understanding up a notch and really make their workflow sing.
The question “Where are my images?” creeps up on most photographers as they continue to work over years. Three years ago I was convinced that that this “digital asset management” thing was quite possibly overkill for me. After all, I knew most of my images and I had everything organized in directories by year and location. How hard could it be for me to find an image someone might want of Death Valley? My first lesson came when I got a request to see all my flower macro work. I spent hours putting together that request. “Where the #%*!…” reinforces that lesson while at the same time showing that the cure for that disease is a lot less imposing than it might seem at first. Good habits and good presets go a long way toward making Lightroom file management easier, and this series does a great job of helping photographers along that path. (more…)

Many photographers, myself included, are deeply attracted to the idea of getting great digital darkroom results from a single program. That idea is still a bit of a dream, the capabilities of the various programs out there vary far too greatly. Even when looking at the specific issue of raw camera file conversion, Adobe’s Photoshop Lightroom will, by default, produce very different results than in-camera JPEGs or raw images converted by the manufacturer’s software, such as Nikon Capture NX or Canon’s Digital Photo Professional. While Lightroom, and it’s brother Adobe Camera Raw, offer nearly unmatched flexibility in raw conversion, Adobe’s conversions have been tailored towards producing (by default) a different consistent “look” across different camera bodies and different camera manufacturers. While an excellent goal, many photographers prefer the “secret sauce” looks provided by those manufacturers, and wish they could easily create those looks within a more general and more flexible program such as Lightroom.
To directly address this need, late last year Adobe Labs released a second beta of their DNG profiles for Lightroom and Adobe Camera RAW. (Despite the name, if you wish to use these new profiles you do not need to use the DNG (Adobe’s Digital NeGative) format yourself. (You will need at least a few DNG images if you with to use Adobe Labs’ associated DNG Profile editor, though, more on that later.) These profiles attempt to match many of the facets of the “look” of a photograph to the look of that image as if it were processed by the camera or the manufacturer’s camera software. (more…)
In my last post, I described a basic workflow for using Lightroom to produce black and white images from color originals. In general, the process is simple and problem-free, but there are two specific areas where problems have arisen and suggest some strategies for working with them.
The first problem is easy enough to explain, if you have a smooth gradient from one hue to another, such as the pink-to-purple-to-blue transition of an earth shadow, you may need to exercise restraint and caution with the Grayscale Mix controls. It’s fairly easy, particularly if you use large or very differing adjustment values for the different hues in the gradient, to end up with unnatural looking results. In most cases, this is easy to fix, once you actually notice it, by careful adjustment of the sliders, but occasionally it won’t be, and you’ll have to resort to other techniques (perhaps the gradient filter tool, or working the image with other tools in Photoshop) to realize your vision.
The second problem is noise. Sometimes strong adjustments to the Grayscale Mix sliders will really bring out noise in an image, I often run into this when darkening skies. Noise reduction can help here, but, there’s a catch…
A third problem is trickier, a longstanding issue in black and white conversions in Lightroom, as well as Adobe Camera Raw, is a set of artifacts that often crop up along edges of images you’d applied strong Grayscale Mix adjustment effects. Below, I’ve included a 100% crop of a detail along the top of the mountain from the example in my previous post.

Nearly every digital camera on the market is built around a sensor designed for color imaging. As a result, it’s a little too easy to forget they can be used to produce fine black-and-white images as well. That’s a pity, because, in many ways, a workflow that starts from a color RAW image offers enormous power and flexibility. In this post, we’ll take an introductory look at producing black and white images from color digital RAW files using Adobe Photoshop Lightroom.
Getting started couldn’t be simpler, after having imported your image into Lightroom and moving to the Develop module, notice that at the top of the “Basic” panel Lightroom offers a choice of Color and Greyscale “treatments”, switching from one to the other is as simple as clicking on one of the names-but not quite yet. First, you’ll want to consider adjusting the white balance, which probably sounds a little confusing at first. After all, white balance is all about adjusting the image to be warmer or cooler, and yet we know we’re going to end up with a neutral result, what gives?
In my post a few days back, I walked through my own process of setting some specifications for a new desktop machine to run Lightroom, but having gotten my intentions in order it was time to actually go out and buy something, somewhere. But what did I buy, and why? (more…)
In the past month or two I became aware of how I was losing a lot of time and personal sanity editing images on my primary work desktop, the performance of Adobe Photoshop Lightroom 2.3 on my old system was both poor and erratic, so I’m replacing it. In this article I’ll share with you my limited investigations into Lightroom performance and configuring a Lightroom-centric photography computer on a budget. (more…)