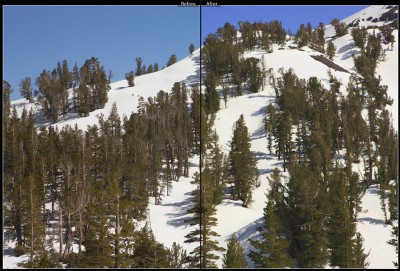
Many photographers, myself included, are deeply attracted to the idea of getting great digital darkroom results from a single program. That idea is still a bit of a dream, the capabilities of the various programs out there vary far too greatly. Even when looking at the specific issue of raw camera file conversion, Adobe’s Photoshop Lightroom will, by default, produce very different results than in-camera JPEGs or raw images converted by the manufacturer’s software, such as Nikon Capture NX or Canon’s Digital Photo Professional. While Lightroom, and it’s brother Adobe Camera Raw, offer nearly unmatched flexibility in raw conversion, Adobe’s conversions have been tailored towards producing (by default) a different consistent “look” across different camera bodies and different camera manufacturers. While an excellent goal, many photographers prefer the “secret sauce” looks provided by those manufacturers, and wish they could easily create those looks within a more general and more flexible program such as Lightroom.
To directly address this need, late last year Adobe Labs released a second beta of their DNG profiles for Lightroom and Adobe Camera RAW. (Despite the name, if you wish to use these new profiles you do not need to use the DNG (Adobe’s Digital NeGative) format yourself. (You will need at least a few DNG images if you with to use Adobe Labs’ associated DNG Profile editor, though, more on that later.) These profiles attempt to match many of the facets of the “look” of a photograph to the look of that image as if it were processed by the camera or the manufacturer’s camera software.
Installation is very easy and it is described well at the link above, just be sure to not have Lightroom or Photoshop running when you perform the installation. Once you’ve installed the package, you’ll find the new optional profiles offered as options in the Camera Calibration sub-panel of the right-side menu of the Develop tab in Lightroom, or in the Camera Calibration tab of Adobe Camera Raw.
For the Canon 1Ds Mark III (and presumably many other of Canon’s cameras), installing these new profiles provides a wealth of different looks quickly selectable via those dropdown menus I previously described. Working down the list, ACR 4.3 and ACR 4.4 provide the default “looks” that Adobe Camera Raw provided in those versions respectively. Adobe Standard is a new (beta) attempt at a cross-manufacturer look that is said to produce produce better colors, particulaly in the reds, oranges and yellows. For the 1Ds III, Camera Faithful, Camera Landscape, Camera Neutral, Camera Portrait and Camera Standard are direct attempts to model the color and tonal response of Canon’s faithful, landscape, neutral, portrait and standard picture styles, Nikon shooters will presumably find a slightly different menu of profiles where the name begins with the word “Camera.”
In a future installment, I’ll talk a bit about Adobe’s DNG Profile Editor, which allows you to create or modify profiles on your own, allowing you to create your own secret sauce.
By replicating all these proprietary “looks” Adobe’s new DNG profiles allow me to spend more of my time in Lightroom and less time bouncing back and forth between editing environments– simplifying my workflow and speeding the time I spend in my digital darkroom. They’re simple to install and very effective, take a look!
stan
21 Nov 2009Where is the future installment on Adobe’s DNG Profile Editor?