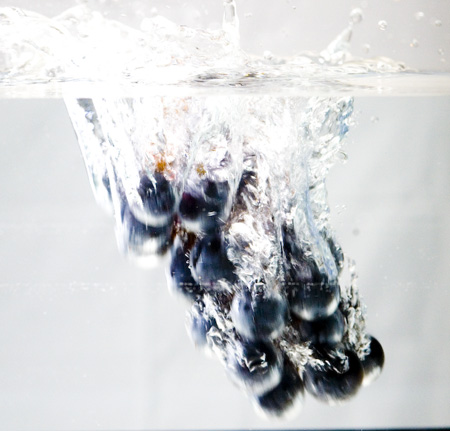
One of the most fun types of shoots we get asked to do regularly is the pour shot. I personally like the pour shot because it’s technically challenging, visually arresting and sometimes unpredictable.
Keep Dry
As you might imagine, working with flying liquids can present some unique challenges. First and foremost to consider is safety. Everything we work with in the studio is powered by electricity so precautions need to be taken to keep the volts away from the drips. In order to make sure we keep the sensitive equipment at a good distance we’ll build the set and do some test drops of the items before we break out the lights, camera or computer. After a couple of drops we can tell where the flying liquid will land and know where we can safely put the gear. On a couple of occasions we’ve even gone so far as to mark out the area on the floor with gaffer’s tape.
Build the Set
Most of the time you’ll want to build a set for shooting flying liquids. Many of the drop/pour shots we do end up making a big mess. As a precaution we’ll spread plastic drop cloths on the floor before we build the set. Most times we’ll use a plastic fish tank as a shooting tank. In the past we’ve built custom tanks out of plexi sheets but those always take more time to build than you think they will and invariable will spring a leak at some point during the shoot. Also – remember that water is heavy, any shooting platform you use has to be sturdy enough to hold all of that weight. At eight pounds per gallon a 30 gallon tank will weigh 240 pounds.
Timing the drop
When doing drop shots, one of the most challenging aspects can be timing the shutter to properly coincide with the drop. Catching the item at the right time and place is crucial and a bit of specialized equipment makes it much easier and more efficient. A beam breaker or similar electronic trigger can be valuable when working this out. The classic DaleBeam system is great and very comprehensive. Other optical triggers are out there and have all kinds of bells and whistles. Now I like esoteric gear as much as the next photographer, but I also like other things like skiing and fishing and going out with my family. The idea of dropping $1800 (suppliers include KaptureGroup, and phototrap) on a trigger kit that I might use once or twice a year is difficult. If you’re in a major market renting is one option, another is to build your own trigger set. If you’re not afraid of a breadboard and know how to use wire strippers there are a few diy kits available for purchase online. A simple casing from RadioShack and some black tape help clean these up and make them presentable. I’m not saying you’re going to be selling them on Ebay or anything, but they work well and they’re relatively cheap. Also, having a variable digital delay timer is helpful. This will help you dial in the placement of the shot. Of course you can also do in the old fashioned way, manually (1-2-3-drop.) Shooting digitally makes manual drop/shoot much easier.
Freezing Motion
Depending on the type of shot you’re going for, you’ll need to vary the level of motion freeze. Some shot’s you’ll want a bit of motion blur, on others you’ll want to completely freeze the motion. Different models of strobes have different flash durations. Most standard monolight or power pack strobes have a relatively long flash duration (although there are a few brands that have very short durations.) that are not suitable for freezing flying liquids. During the testing phase of our assignment for the fruit splashes shown below we found that our Calumet strobes wouldn’t sufficiently freeze the action, even with the power as low as it would go. (reducing the output reduces the flash duration.) One good solution is to use several on-camera type flash units. While their power is relatively low, using several of them slaved together can overcome that. For the final shots of the fruit splashed shown below we used a combination of 5 Canon 430’s and 580’s.


One of the reasons I like being a food photographer is the control and the detailed nature of the work. Working with moving liquids forces me to give up some of that control – every now and then that’s fun. If you’re going to work with drop shots you need to be ok giving up some of that control and learn to embrace the unpredictable nature of this work. You’ll also need to be able to explain that to your client and your crew. A shoot may take 2 hours, it may take 2 days. Like all things in this job, managing expectations is key.

eppyphotog
18 Mar 2009Steve
I love doing splash shots also. Clients don’t understand that 99% of this is all in the preparation of the set and pre-testing. I am in the process of building an infra red trigger, the instructions I got from a web site called http://www.instructables.com.
I have only a couple of splash shots on my web site http://www.epsteinstudios.com – really need to update sight. I will try to email you the instructions for this trigger. I can’t attach pdf. to this comment.
Ken