Video Review: Reichmann and Resnick’s “Where the #%*! are My Pictures?””

Whirlwind Rainbow, Seljalandfoss, Iceland.   Image Copyright 2009 Joe Decker
Whirlwind Rainbow. Seljalandfoss, Iceland. Selecting the right keywords for this image will be critical to helping me sell this image as stock. Image Copyright 2009 Joe Decker

Several times a year I teach a one-day workshop on optimizing images using Adobe Photoshop Lightroom 2 at the local art league, and in doing so I’m often asked for a good book recommendation for someone learning Lightroom. As I’ve mentioned in my previous review, my usual recommendation has been Martin Evening’s book The Adobe Photoshop Lightroom 2 Book: The Complete Guide for Photographers.

In the process of keeping my eyes open for new resources, I recently purchased and watched “Where the #%*! are My Pictures?”, a three-hour video series by Michael Reichmann and Seth Resnick which focuses on the the file-handling, digital asset management (roughly speaking, the Library module) aspects of Lightroom. I’ll be adding this to my list of top recommendations for Lightroom resources, I think it’s particularly appropriate for folks who have a basic familiarity with Lightroom but are ready to take their understanding up a notch and really make their workflow sing.

The question “Where are my images?” creeps up on most photographers as they continue to work over years. Three years ago I was convinced that that this “digital asset management” thing was quite possibly overkill for me. After all, I knew most of my images and I had everything organized in directories by year and location. How hard could it be for me to find an image someone might want of Death Valley? My first lesson came when I got a request to see all my flower macro work. I spent hours putting together that request. “Where the #%*!…” reinforces that lesson while at the same time showing that the cure for that disease is a lot less imposing than it might seem at first. Good habits and good presets go a long way toward making Lightroom file management easier, and this series does a great job of helping photographers along that path. (more…)

Continue Reading

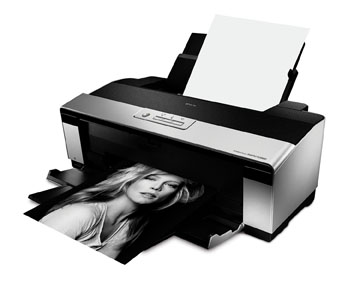
Epson Stylus Photo R2880 Inkjet Printer

A 13×19″ pigment-ink printer that is a dream come true.

Epson Stylus Photo R2880 Inkjet Printer. A topnotch performer, consistent, reliable, producing prints with amazing clarity, detail, and a rich tapestry of color. And it's relatively quiet in operation. Fairly fast, as well. On top of that, you have the option of sheet-fed or roll-paper operation, with included roll paper holders (for panoramics,for example).
Epson Stylus Photo R2880 Inkjet Printer. A topnotch performer, consistent, reliable, producing prints with amazing clarity, detail, and a rich tapestry of color. And it's relatively quiet in operation. Fairly fast, as well. On top of that, you have the option of sheet-fed or roll-paper operation, with included roll paper holders (for panoramics, for example).

In the past, my purchase of printers was largely focused on dye-based inkjets. The dye-based (not to be confused with dye-sub) printer, you might say, is the consumer-friendly version: Dye-based ink technology is typically found in popular 8×10 and many snapshot printers. The technology is aimed at consumer-friendly papers, namely glossy, greeting cards, and the like.

Many snapshot printers employ dye-sublimation printing technology for longer-lasting prints, often on virtually indestructible paper-but with less punch and pizzazz than what we get off inkjet. Thermal ink technologies use preloaded cassettes loaded with a ribbon, and will deliver a number of prints matched to the number of sheets of paper provided in the package-in other words, when you buy a dye-sub pack, you’re getting the complete package–nothing more to buy in consumables. Do the math-you’ll see it’s simplified.

With inkjet snapshot printers, the ink comes in a cassette, along with paper, but it’s not an exact match-you may have a few sheets of paper left over when the ink runs out. And it’s a dye-based ink. (more…)

Continue Reading

Alien Skin Software’s Photoshop Plug-ins

A wide range of add-ons to help you create sometimes startling, sometimes pretentious images.

Original. I made this f/4.5 exposure of these columbine blossoms with a Nikon D300 and Nikon 10-24mm lens (at 24mm), by available light. Breezy conditions dictated a fast shutter speed (1/500) and the shade mandated a high ISO (1600). Follow this image through its various iterations brought about though the use of Alien Skin Software's plug-ins. Photo  ©2009 Jack Neubart. All rights reserved.
Original. I made this f/4.5 exposure of these columbine blossoms with a Nikon D300 and Nikon 10-24mm lens (at 24mm), by available light. Breezy conditions dictated a fast shutter speed (1/500) and the shade mandated a high ISO (1600). Follow this image through its various iterations brought about though the use of Alien Skin Software's plug-ins. Photo ©2009 Jack Neubart. All rights reserved.

I’ve worked with Alien Skin Software plug-ins for years. As with other plug-ins, I at times became so enchanted by them that I lost sight of the original image or my purpose in using the plug-in. And once I realized that I was allowing myself to be swept up in this mania of adding effects just for the sake of doing so, without rhyme or reason, I pulled back and placed some restraints on myself– actually, it’s an ongoing process. (more…)

Continue Reading

Large vs. Small Sensors — Pro’s and Con’s

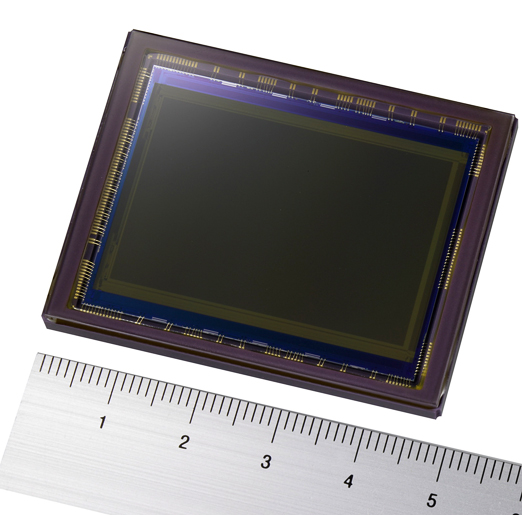
Before switching to digital capture, the majority of long-time photo enthusiasts used analog SLR cameras with a 24x36mm film frame. This format was the most common in conventional photography but it was virtually abandoned when affordable digital SLRs were being developed. While a few of the early pro cameras employed a 24x36mm sensor, they were prohibitively expensive. In order to keep their consumer-oriented DSLRs more affordable, all of the manufacturers decided to use smaller — and hence, much less expensive — sensors.

An increasing number of DSLRs are employing an oversized sensor, the same size as a frame of 35mm film. As we'll see, this aspect can provide some significant benefits but also some drawbacks.

(more…)

Continue Reading

Tamron 10-24mm f/3.5-4.5 Di-II LD SP AF Aspherical [IF] Zoom Review: Field Test Report

Peter Burian tests this new lens with true ultra-wide angle capability when used on a DSLR with an APS-C size sensor


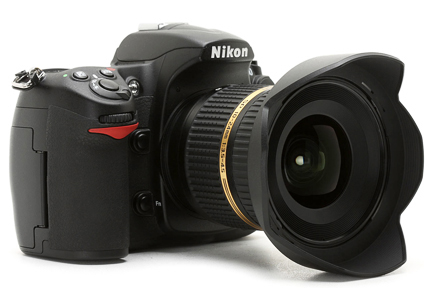
Since the vast majority of digital SLR cameras employ a relatively small sensor, there’s a definite need for very short lenses for an expansive angle of view. Hence, Tamron’s highly-rated 11-18mm f/4.5-5.6 Di II zoom has been a best seller among serious photo enthusiasts who appreciate ultra wide angle images. In my tests, that zoom produced beautiful results, but the new 10-24mm model is even better in some respects.

Tamron SP AF 10-24mm

(more…)

Continue Reading

Review: NexStar Hard Drive Dock

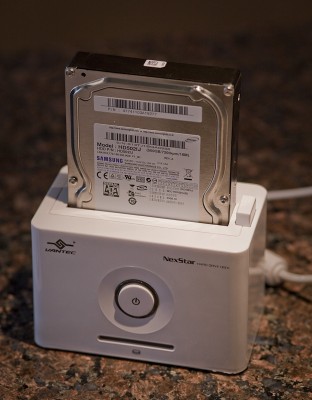
NexStar single-bay Hard Drive Dock, with a 3.5" disk inserted

One of the most important aspects of any backup system is having a process, doing something consistently and uniformly enough that it’s easy to make sense of what’s going on, where information is, and so on. My backup process, while complete, has been a little ad hoc at times, and so as part of a move to simplify and organize my backup strategies I’m moving to keeping most of my backups on bare “internal” hard disks. While there are several ways of hooking bare drives externally to systems, recently I’ve become aware of a couple products that allow hard disks to be used almost like video game cartridges, plug in the drive, and go. Excited by the fact that this would simplify working with bare drives, I recently purchased the Vantec NexStar NST-D100SU 2.5-Inch/3.5-Inch SATA to USB 2.0 and eSATA Hard Drive Dock (White) and wanted to share my initial impressions and experiences with the product, which I’ll be calling “the Dock”, with apologies to my Apple readers.

The Dock connects your internal disk drive using either a USB or eSATA connection.  NexStar provides not only USB and eSATA connectors but also a desktop bracket and cable that hooks to an internal SATA connector and provides an eSATA connector, as well as the obligatory power cables (each are actually labeled on the cable noting which type of cable it is, not entirely necessary but a nice touch for those of us who occasionally seem to generate cable nests).  A simple instruction book is provided as well as a driver mini-CD/installation guide, while drivers are provided on the disk the disk should only be necessary for users of Windows 98/SE, or MacOS 8.6 or earlier, Windows ME/2K/XP/Vista, MacOS 9 (or later) and Linux 2.4.18 (or later) users should be able to plug and play according to their documentation.  I tested the unit on an XP-based laptop via USB, and on a 64-bit Windows Vista system using eSATA.  Vantec also makes a Vantec NexStar NST-D200SU 2.5-Inch/3.5-Inch SATA to USB 2.0/eSATA Dual Bay Hard Drive Dock (White) version of the Dock but I haven’t tested that myself. (more…)

Continue Reading

Product Review – Wacom Bamboo

As someone who’s been using Photoshop since version 1 I’ve had my share of bad days with a mouse. The occasional forearm and wrist numbness that come with a long session of silhouetting and clipping paths is becoming more and more common. (Those long sessions of Call of Duty don’t help either.) I’ve never been one for the pen/tablet tools though. After all, my abysmal hand skills are one reason I got into photography in the first place. But about a month ago I got an assignment that was going to require some pretty heavy use of layer masks. About the same time I came across a display at the local office supply store of the new Bamboo (Small) Pen Tablet with Pen Only line from Wacom. Wacom is the leading brand when it comes to pen/tablet input systems, they’ve also got the Cintiq line of pen/monitor systems that are a lot of fun. But since I’m not an illustrator, and rarely do heavy retouching or manipulation, the pen systems haven’t held a lot of sway with me. (more…)

Continue Reading

Review: The Kacey Beauty Reflector

I was recently given the opportunity to experiment with a Kacey Beauty Dish, so I decided to put together a review/explanation/demonstration.

One of the blogs I read all the time is the Strobist blog (www.strobist.com). David Hobby has been writing this blog for a while now, and I have learned lots from him.

One of the great things he did when he got started was he realized that it was not going to be possible for him to answer every question, or respond to every comment. So, being the innovative person that he is, he started a flickr forum that allows various photographers from all over the world to learn, share and teach one another.

That forum is here:   http://www.flickr.com/groups/strobist/

Recently on this flickr forum there was a review and discussion about the Kacey Beauty Dish. Musician/photographer Steve Korn apparently got one to play with, and offered his opinions in a well-written review here.

I was lucky enough to be able to play with one of these beauty dishes (Kacey calls them “Beauty Reflectors”) recently, and took it on several different shoots. (more…)

Continue Reading

Nikon 18-200mm f/3.5-5.6G IF-ED AF-S DX VR Nikkor Review

This zoom has taken me far and wide, expanding my creative vision.

I wasn’t about to be swayed easily. Until now I was not a Nikon enthusiast–my camera allegiances lay elsewhere. So, if I was going to start using Nikon gear seriously, that gear had better prove itself. Accordingly, when I tested out the D300, I chose the one lens that I’d anticipated would either demonstrate the merits of this system or let it fall flat on its face. I wanted a lens wide enough for scenics and groups and long enough to capture people and wildlife unobtrusively. In an all-purpose lens, I also wanted image stabilization, or, as Nikon calls it, Vibration Reduction (VR)–or specifically second-gen Enhanced VR II Vibration Reduction–a nice adjunct when shooting by available light or stretching the limits of a low light-sensitivity rating (ISO).

What I really wanted was one lens that would do it all. I didn’t want to schlep around three or four lenses as I did with my other DSLR system. I wanted a compact solution, but one that would not involve compromise–at least, none that I would notice in everyday shooting.

And that search led me to Nikon’s 18-200 VR. Aside from a fisheye that I carry for an entirely different perspective on the world, this lens is all I’ve carried on recent trips to Germany, Miami, and Las Vegas. It has so much going for it that–well, maybe we should start at the beginning…

jn_01a-compact2
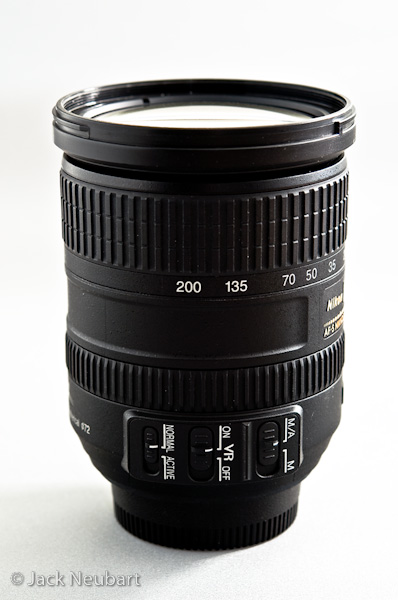
THE LENS. The AF-S DX VR Zoom-NIKKOR 18-200mm f/3.5-5.6G IF-ED is fairly lightweight, and relatively compact when not zoomed out. Note the three switches: one governs focusing (auto with manual override or full manual), VR on/off, and VR mode ("normal" for camera shake and smooth panning or "active" for shooting from a moving vehicle). Frankly, I rarely used this last feature, and when I did, I didn't notice a measurable difference. When fully extended, this lens becomes obvious for what it is: a zoom with telephoto reach. The petal-shaped lens shade may not seem deep enough, but it does the job well. Photo Copyright ©2009 Jack Neubart. All rights reserved.

(more…)

Continue Reading
Close Menu